
In my previous blog, Dataverse Activity Tables, I highlighted the beauty of the out-of-the-box Dataverse Activity tables and how they seamlessly align in a Model-Driven app timeline. At the end of the post, I mentioned that if you create an email, task, or appointment activity, you may encounter an error stating that your message has not yet been submitted. That’s because we need to configure an Exchange Server-Side Synchronisation. Let’s jump into it.
Outlook Integration
If you’ve already added the Timeline control to some apps and have attempted to send an email directly within your app, you may see the below error:
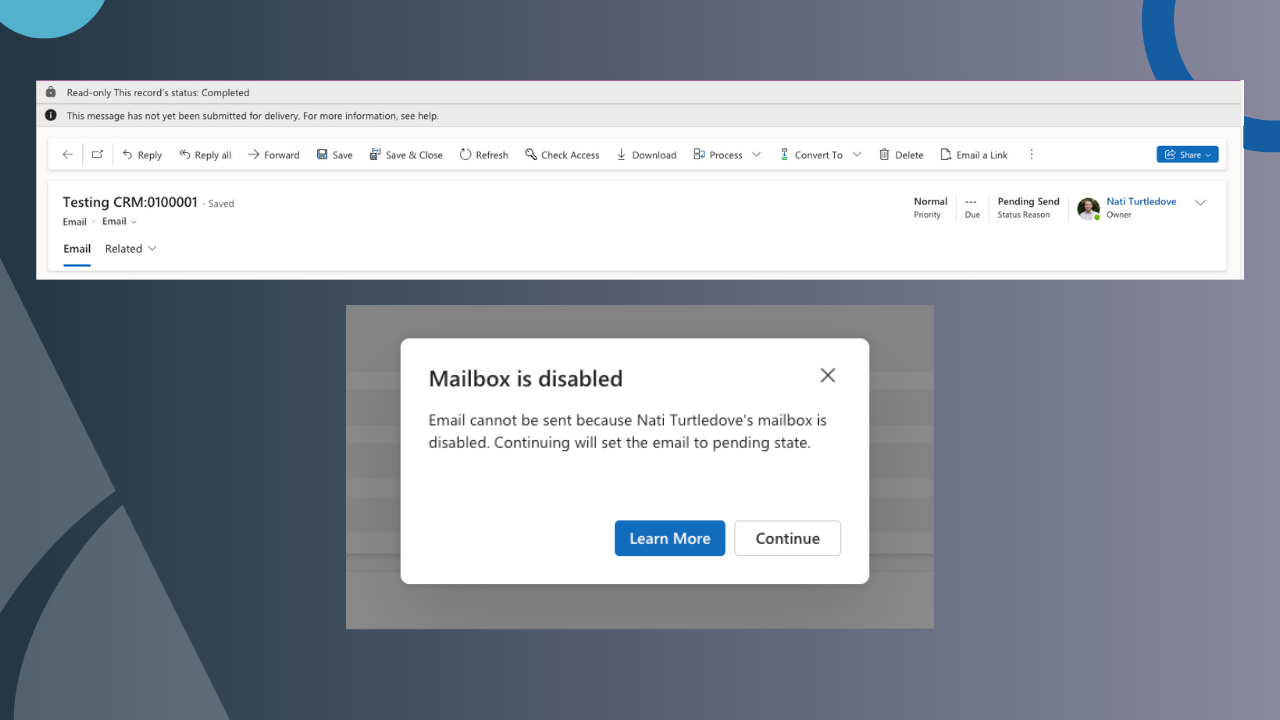
This means that your mailbox profile has not been enabled and approved by the environment admin, allowing these activity tables to work with your Exchange profile.
Server Profiles
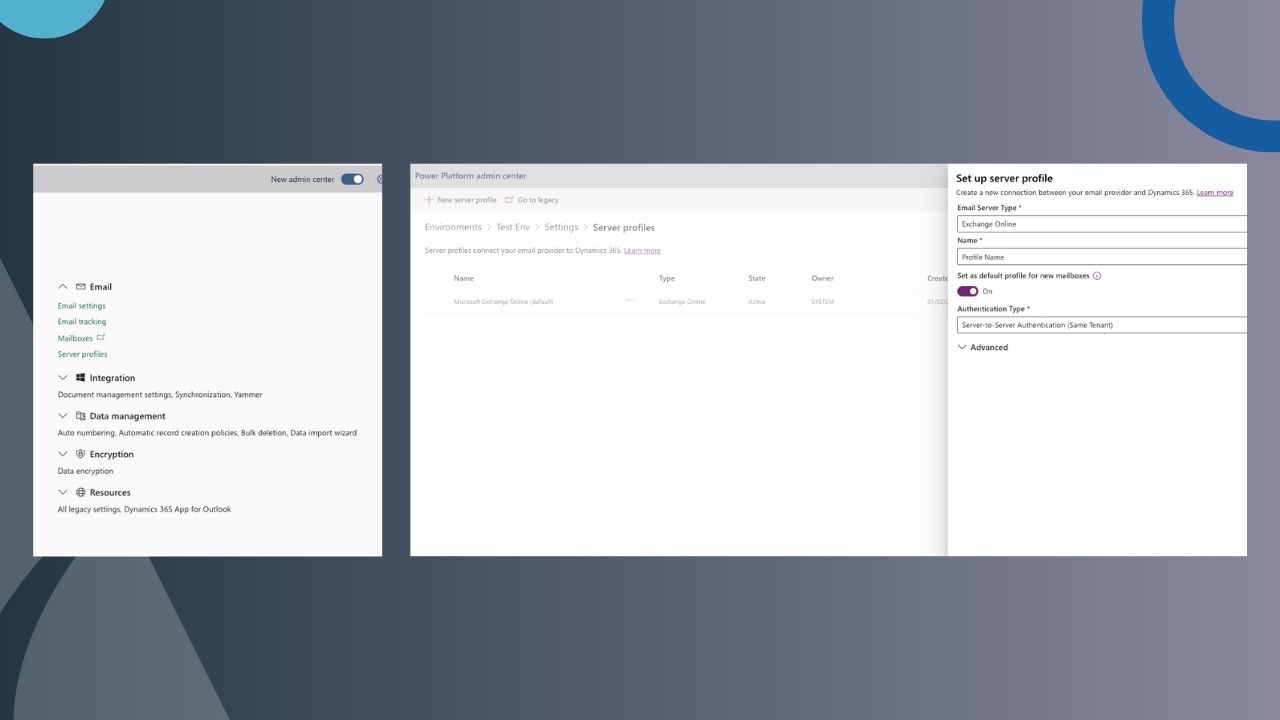
The first step to resolve this is to head to your environment’s Admin Centre, go to Settings, and select Server Profiles. You should have a profile called Microsoft Exchange Online (default) already configured. If not, simply add a new profile, give it a name, select the appropriate email server type (because I’m using Outlook through an Office 365 subscription, I’m selecting Exchange Online), and set the authentication type to server-to-server. If you want, you can also set this profile as the default profile for any new mailboxes added to the environment.
Email Settings
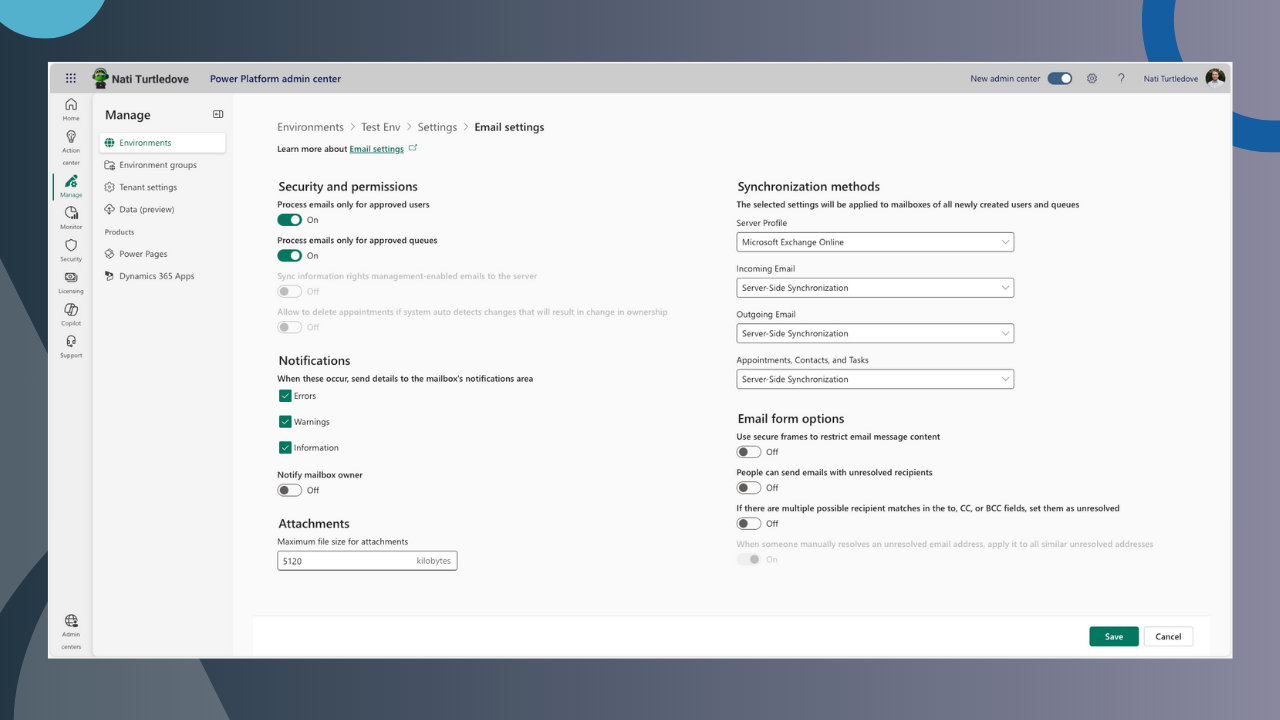
Once you have a Server Profile configured, you can update the email settings. Under the same Email section within the Admin Centre, select Email Settings. Here you should see some options for synchronisation methods. Ensure that all the options are set to Server-Side Synchronisation and you have selected your server profile. By doing this, you are allowing approved Dataverse mailboxes to sync with a user’s Exchange profile, allowing emails, tasks, and appointments created as an activity to sync to their Exchange profile. If I create a task for a contact, the task will also be created in Microsoft To Do and is directly linked with the task in the contact’s record. The same applies to emails and appointments. But before this synchronisation, you need to manually enable and approve existing user mailboxes.
Mailboxes
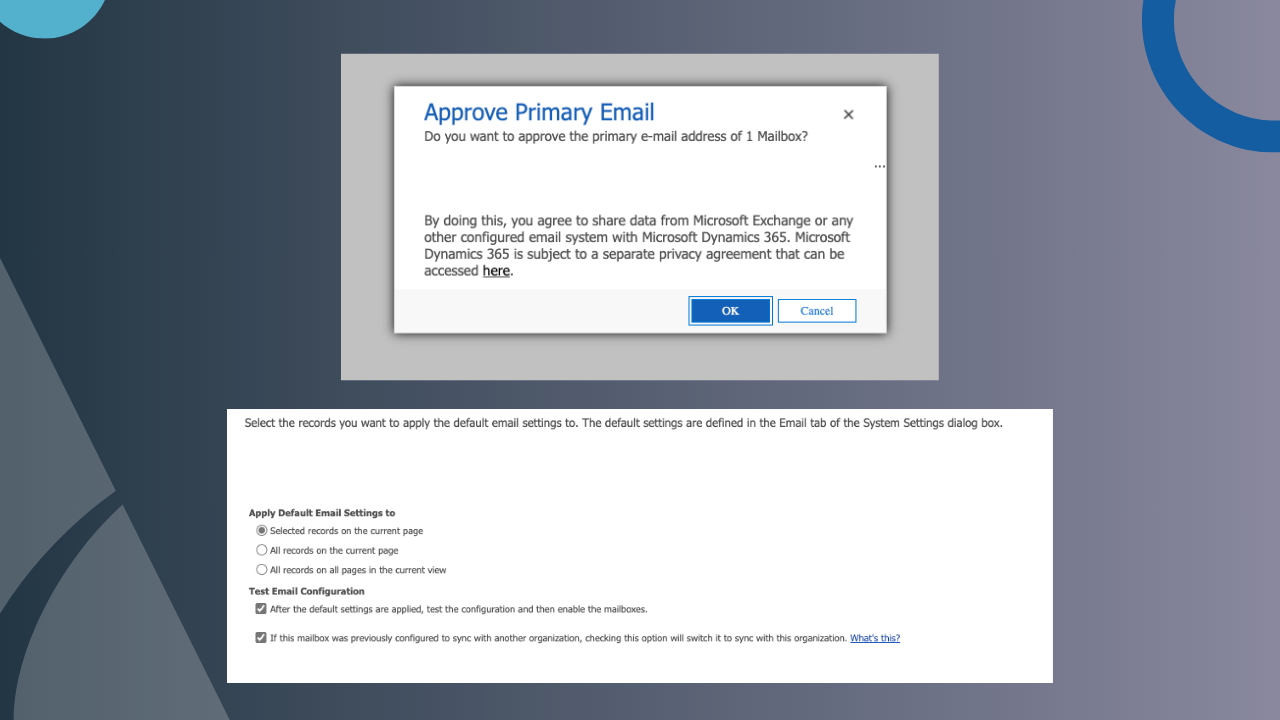
To approve and enable a user’s mailbox, head to your environment’s Admin Centre, and within the Email section, select the Mailbox setting, and the classic experience will be launched. For existing users, you will need to apply the default email settings as the new server profile you created earlier. Whether you are in the new or classic experience, you need to select the users mailboxes and approve them, apply the default email setting, and lastly test and enable the mailboxes. This will run a test on that user’s synced mailbox in the Power Platform environment and will also process any outstanding Exchange-related tasks like emails and appointments created through activity tables.
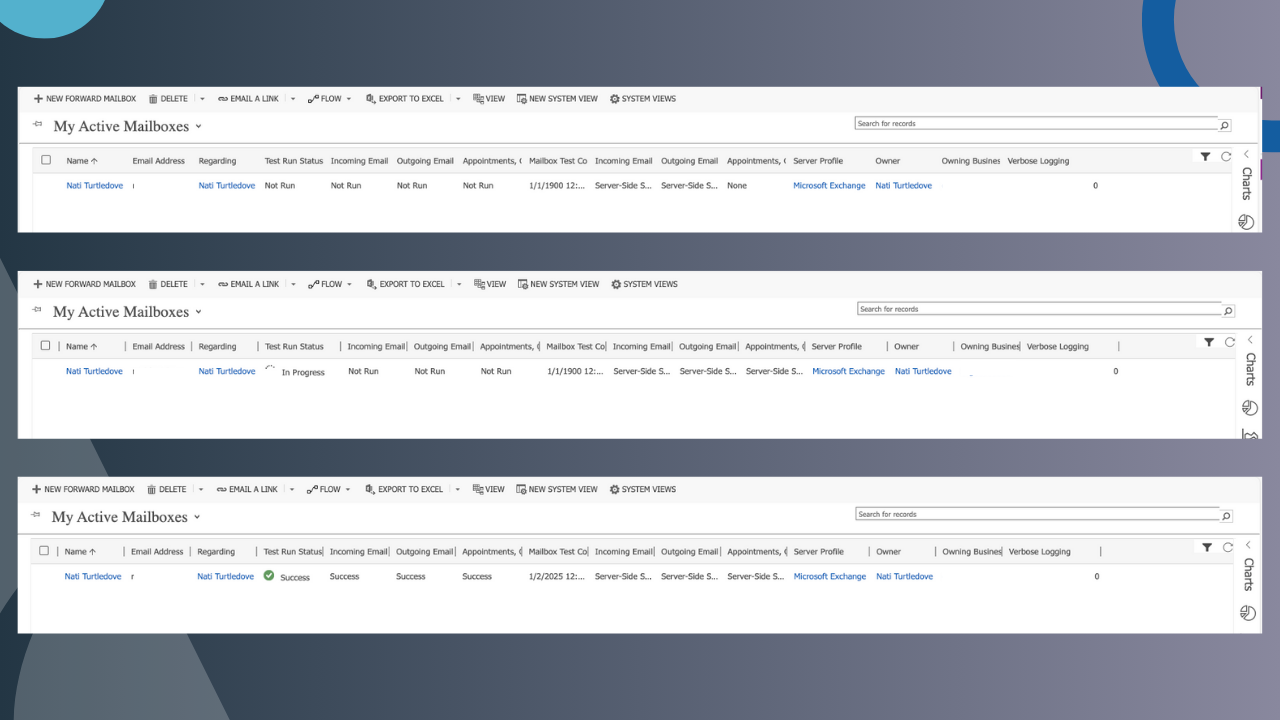
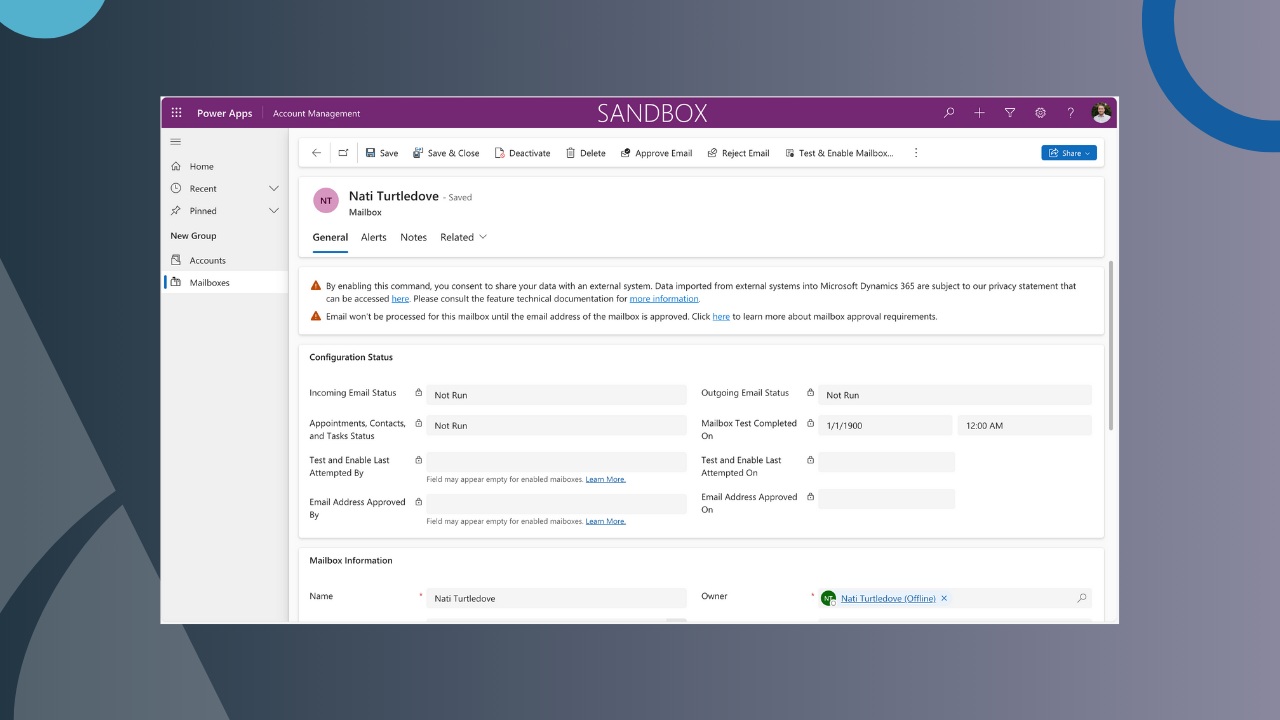
Although the current Admin Centre takes you to the classic experience to engage with environment mailboxes, these settings are managed in the Mailbox table and can be accessed easily if you add the table to a Model-Driven app.
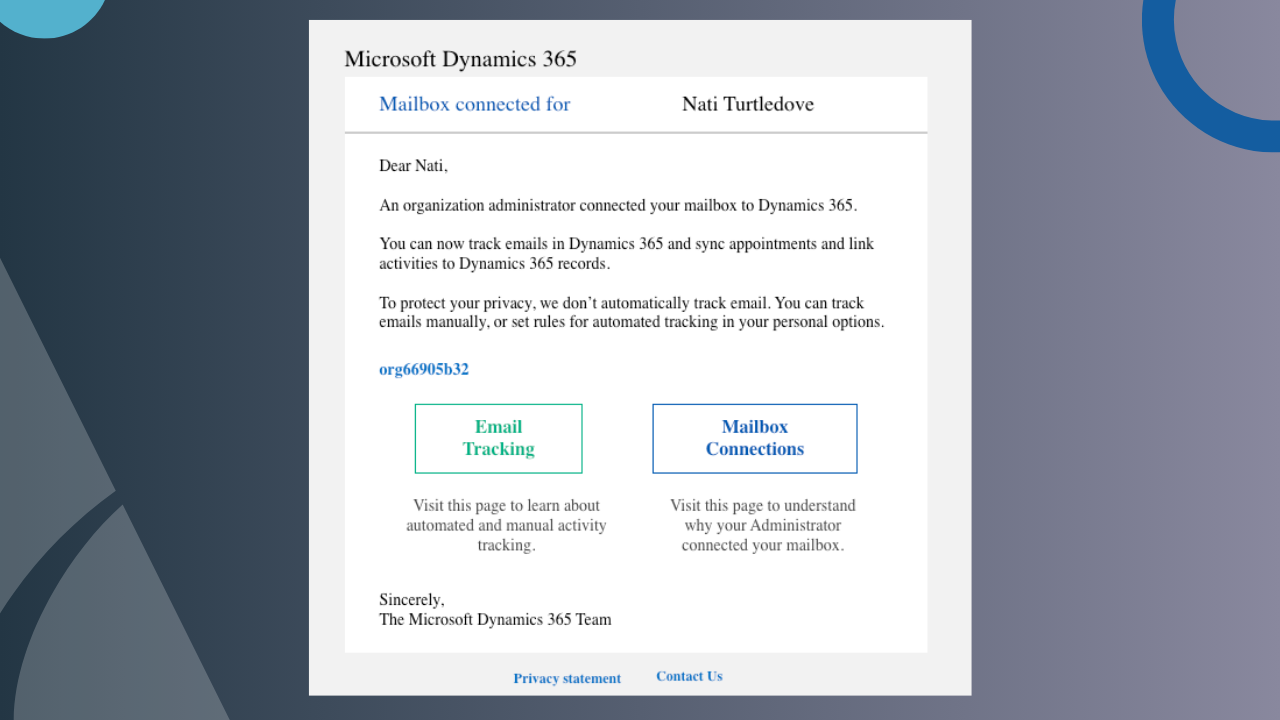
The user may also now receive an email stating that their mailbox has successfully been synced to the Dynamics 365 environment (this is just a generic email and applies to standard Power Platform environments).
In order for users to seamlessly interact with the activity tables while syncing to Exchange, users will need privileges to the activity table and mailbox table in Dataverse.
Dynamics 365 App for Outlook
D365 in the name may scare you away due to licensing, but the Dynamics 365 App for Outlook is a great Outlook tool to consider if you plan to track emails manually between your Power Platform solutions and Outlook. And, you don’t need any further D365 licensing! Your standard Power Apps Premium license covers the licensing requirements for this app.
What is the Dyanmics 365 App for Outlook?
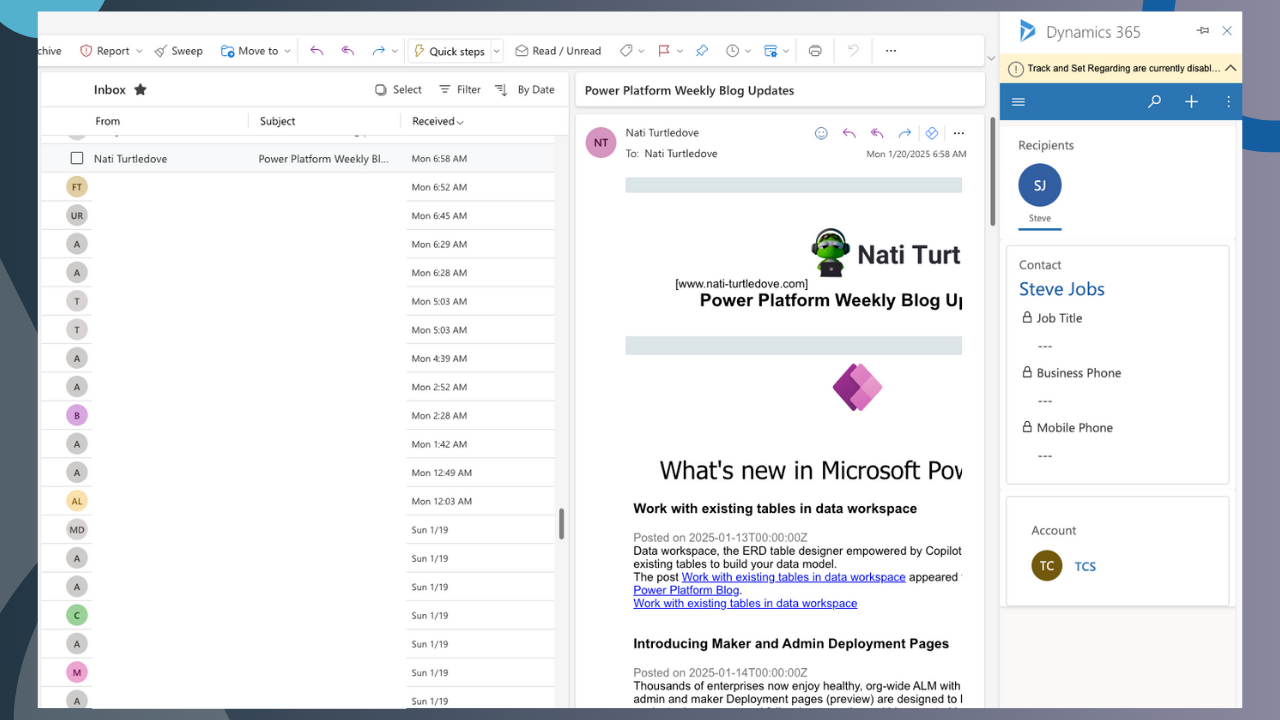
The D365 App is an Outlook plugin app that allows you to launch a simple Model-Driven app experience in the sidebar of Outlook, offering you the ability to view related information about an account or contact if the sender email is an email that exists as an account or contact.
Installing D365 App for Outlook
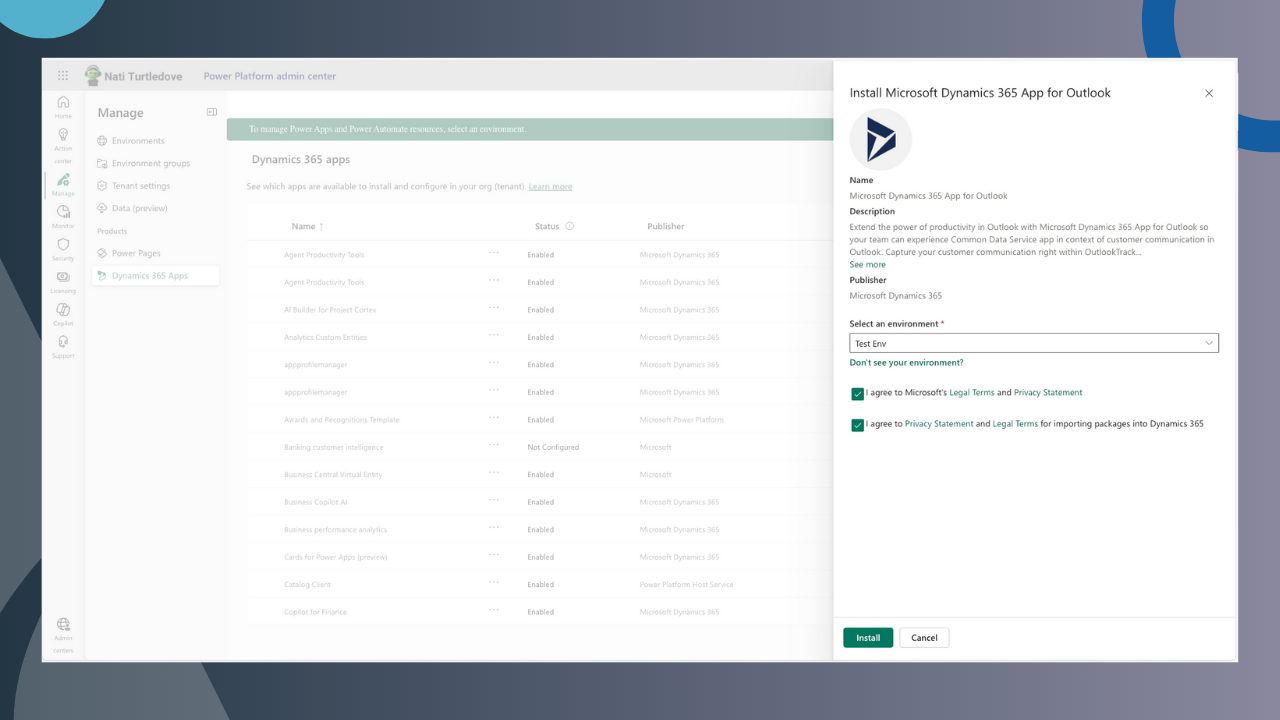
To install this solution, we need to head to the target environment in the Admin Centre, select Resources, Dynamics 365 apps, and then Open App Source. Search for the Dynamics 365 App for Outlook and select Get it now.

Select the target environment and install. It may take some time to install the solution, and you may come across an error about requiring an anchor solution. After a lot of back and forth with Microsoft Support, despite the error, the solution actually installs. I was advised that the environment needs to be enabled for D365 Apps, but I can confirm that the solution works in a plain Power Platform-only Dataverse enabled environment.
Deploy the App
Once the app has installed (or failed to install ), we need to deploy the app to users. Prior to deploying, it is important that a user’s mailbox is approved, tested, and enabled to be eligible for this app. Additionally, users are required to hold the Dynamics 365 App for Outlook User security role.
Within your target environment in the Admin Centre, head to Settings again and select Dynamics 365 App for Outlook under the Resource section. You will be navigated to a new page where you can deploy the app.
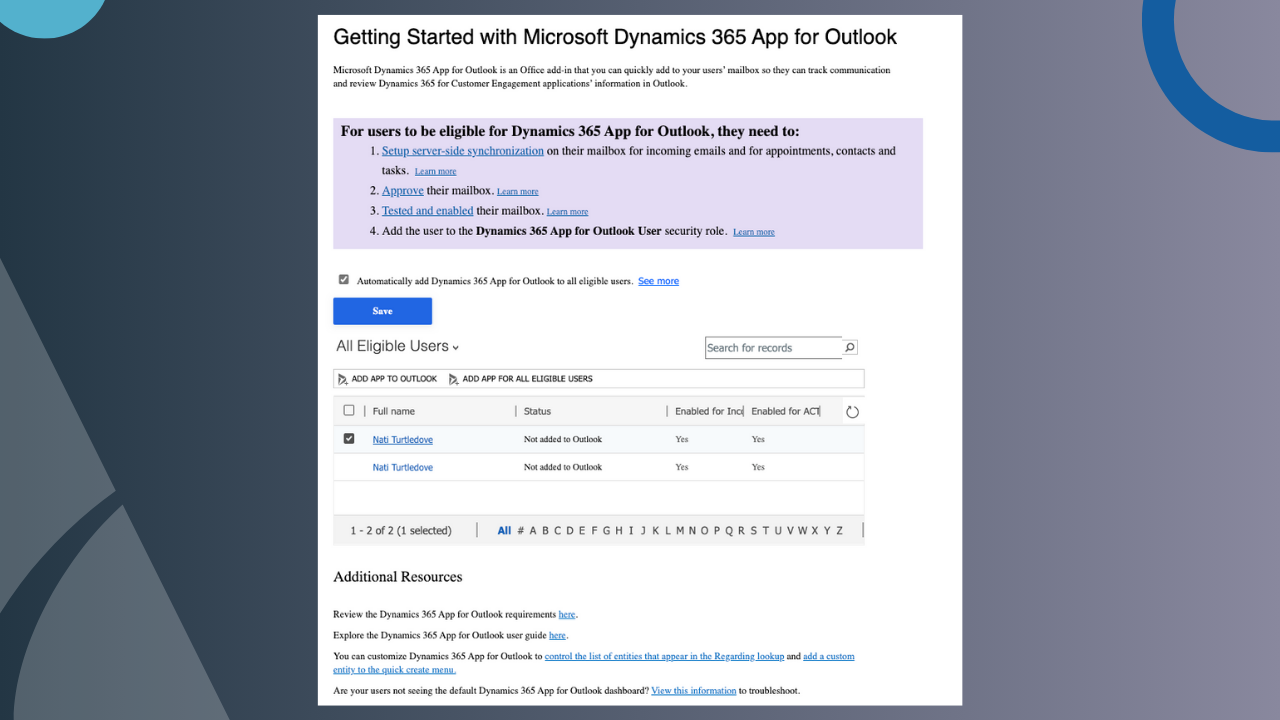
If preferred, you can manually deploy the app to selected eligible users on a need basis. You can, however, set it to auto-deploy to all eligible users
Conclusion
Coming from Canvas apps, I was comfortable building email-integrated solutions. Microsoft even offers a pre-built page template that allows you to send emails directly from a Canvas app. If you want to explore this area a bit more, check out Craig White’s awesome blog on sending emails from Canvas apps at https://platformsofpower.net/.
My recent focus was on utilising the Power Platform’s pre-built data model and configurations to drive simple builds. There is no need to reinvent the wheel when it comes to tasks, emails, appointments, and other activities. Model-Driven apps can handle this all with the standard activity tables, the pre-built timeline, and the correct configuration. In my next post, I’m going to be exploring Power Platform’s ability to track emails through my recently configured mailbox server profiles, auto-adding response emails from accounts and contacts that were sent through my Model-Driven app.


Very nice article. You should perhaps consider mentioning that an Exchange mailbox can only synch with one environment at a time. This made sense in the pre-Dataverse/CDS days but is a real shame in the multi-environment world that exists in most Power Platform-using organizations.
Thanks Donal, glad you enjoyed this post.
You’re absolutely right about the environment mailbox limitations and it is somewhat annoying, especially when conducting parallel UAT and agile deployments.
I’ll definitely add this a bit later today referencing you.
Pingback: Power Apps Email Tracking - Nati Turtledove
Really good serie !
Regarding mailbox synchronization, is it possible to synchronize a shared mailbox? Once the mailbox is shared, users must have access to it in order to send emails—does this mean that Exchange permissions are retained from Dataverse? Is it possible to prepare drafts in the email table (for example, using Power Automate) and allow a user to review and edit the draft before sending it, all within a model-driven app?
I believe sever-side synchronisation will work with shared mailboxes, as long as the users have privileges to sen on behalf as. The permissions would need to be setup in Exchange and will be retained in Dataverse.
When it comes to saving drafts, Im sure you can configure this approval process through Power Automate as the email activity table as the option to save a draft, and you can visibly see the activity status as draft when it is saved. If you do set up this automation, I’d love to hear about it.